This is more a series of assembly instructions rather than a recipe or any kind of baking. I had the opportunity to do some treats for a lego themed 5th birthday party recently and I thought these were too cute not to share with you.
I'll start at the beginning then shall I. I set out to make lego heads on sticks. That seems a lot more gruesome written down than it seemed when I saw pictures online. So I set out all the stuff I would need to get this job done.
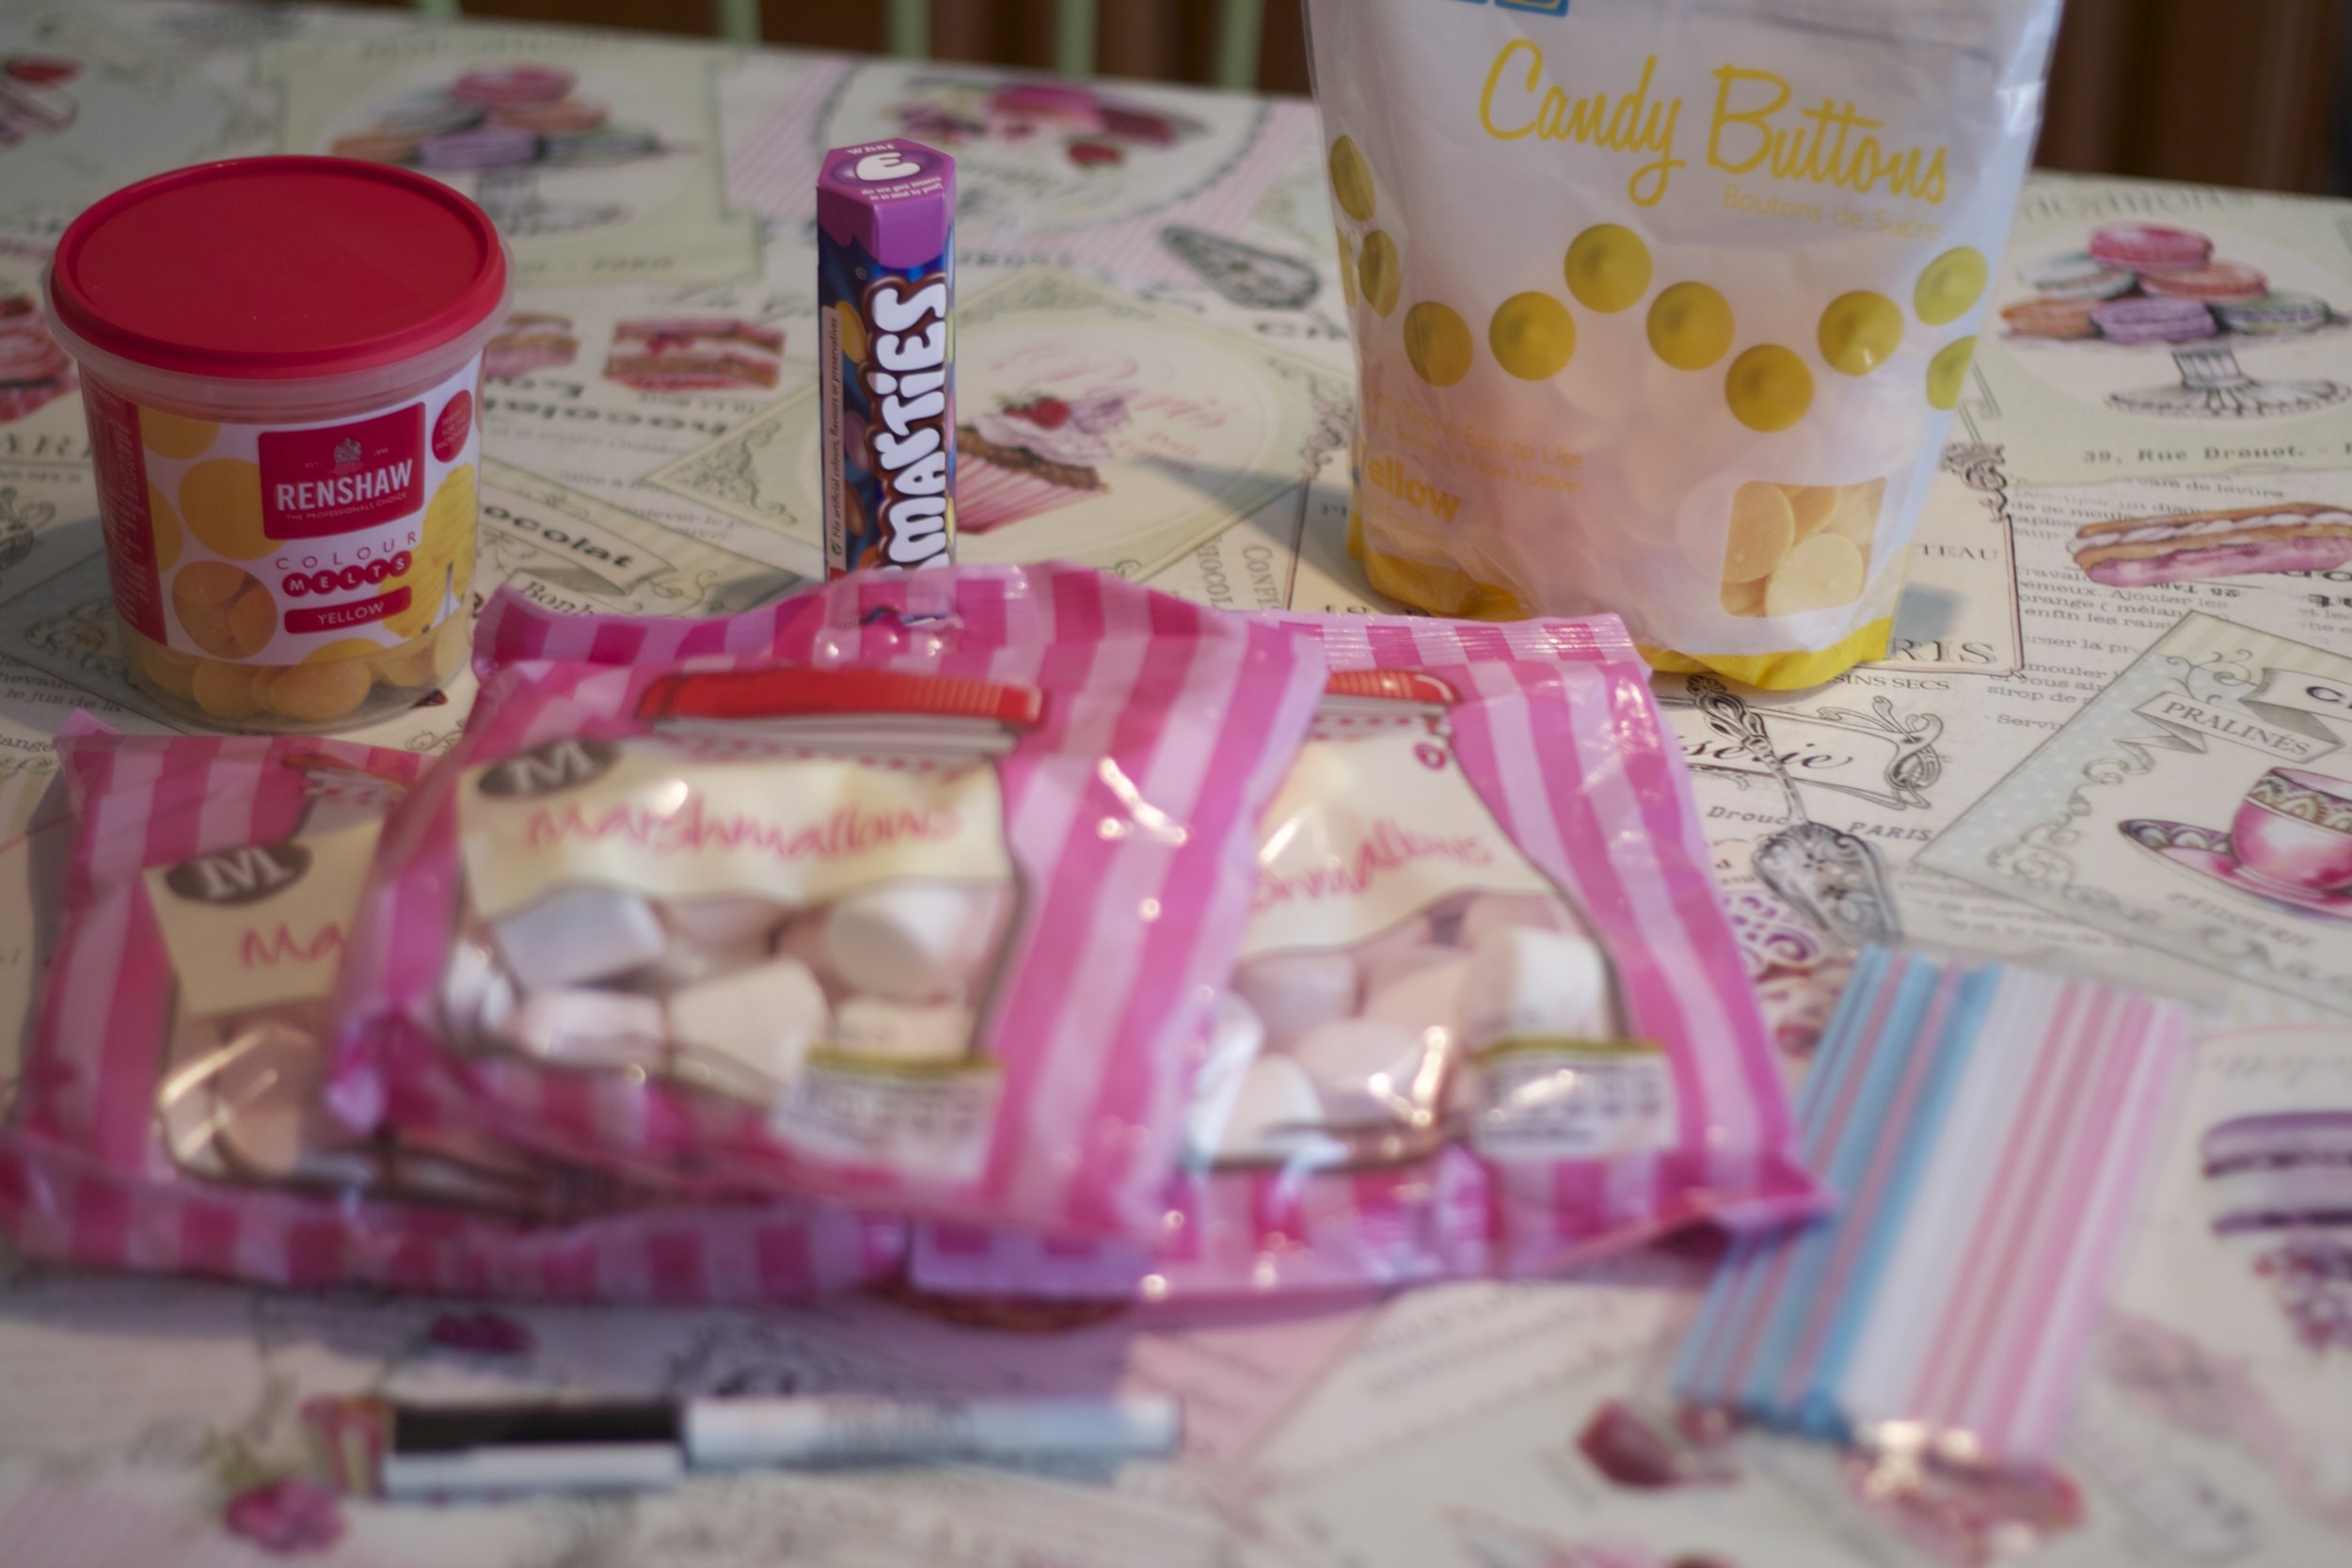
Here we have:
- 3 bags of marshmallows - made with beef gelatine not pork gelatine
- a pack of Wilkinson Cake Pop sticks - picked mainly because they were colourful
- a tube of smarties
- 2 different kind of yellow candy melts - I wanted to see if one was better, easier etc
- an edible pen in 'black liquorice'
Not pictured but I also used:
- Small off set spatula
- small food safe paint brush
- cake pop stand, ready to stick my pops in to dry
- Small tube of black piping icing
Are you sitting comfortably? Good, then I'll begin.
The pack of cake pop sticks contained 50 so I started by going through the bags of marshmallows to find the ones with the best shape. This meant not distorted, with smooth sides and even, also a flat bottom.
I ate too many of the rest.
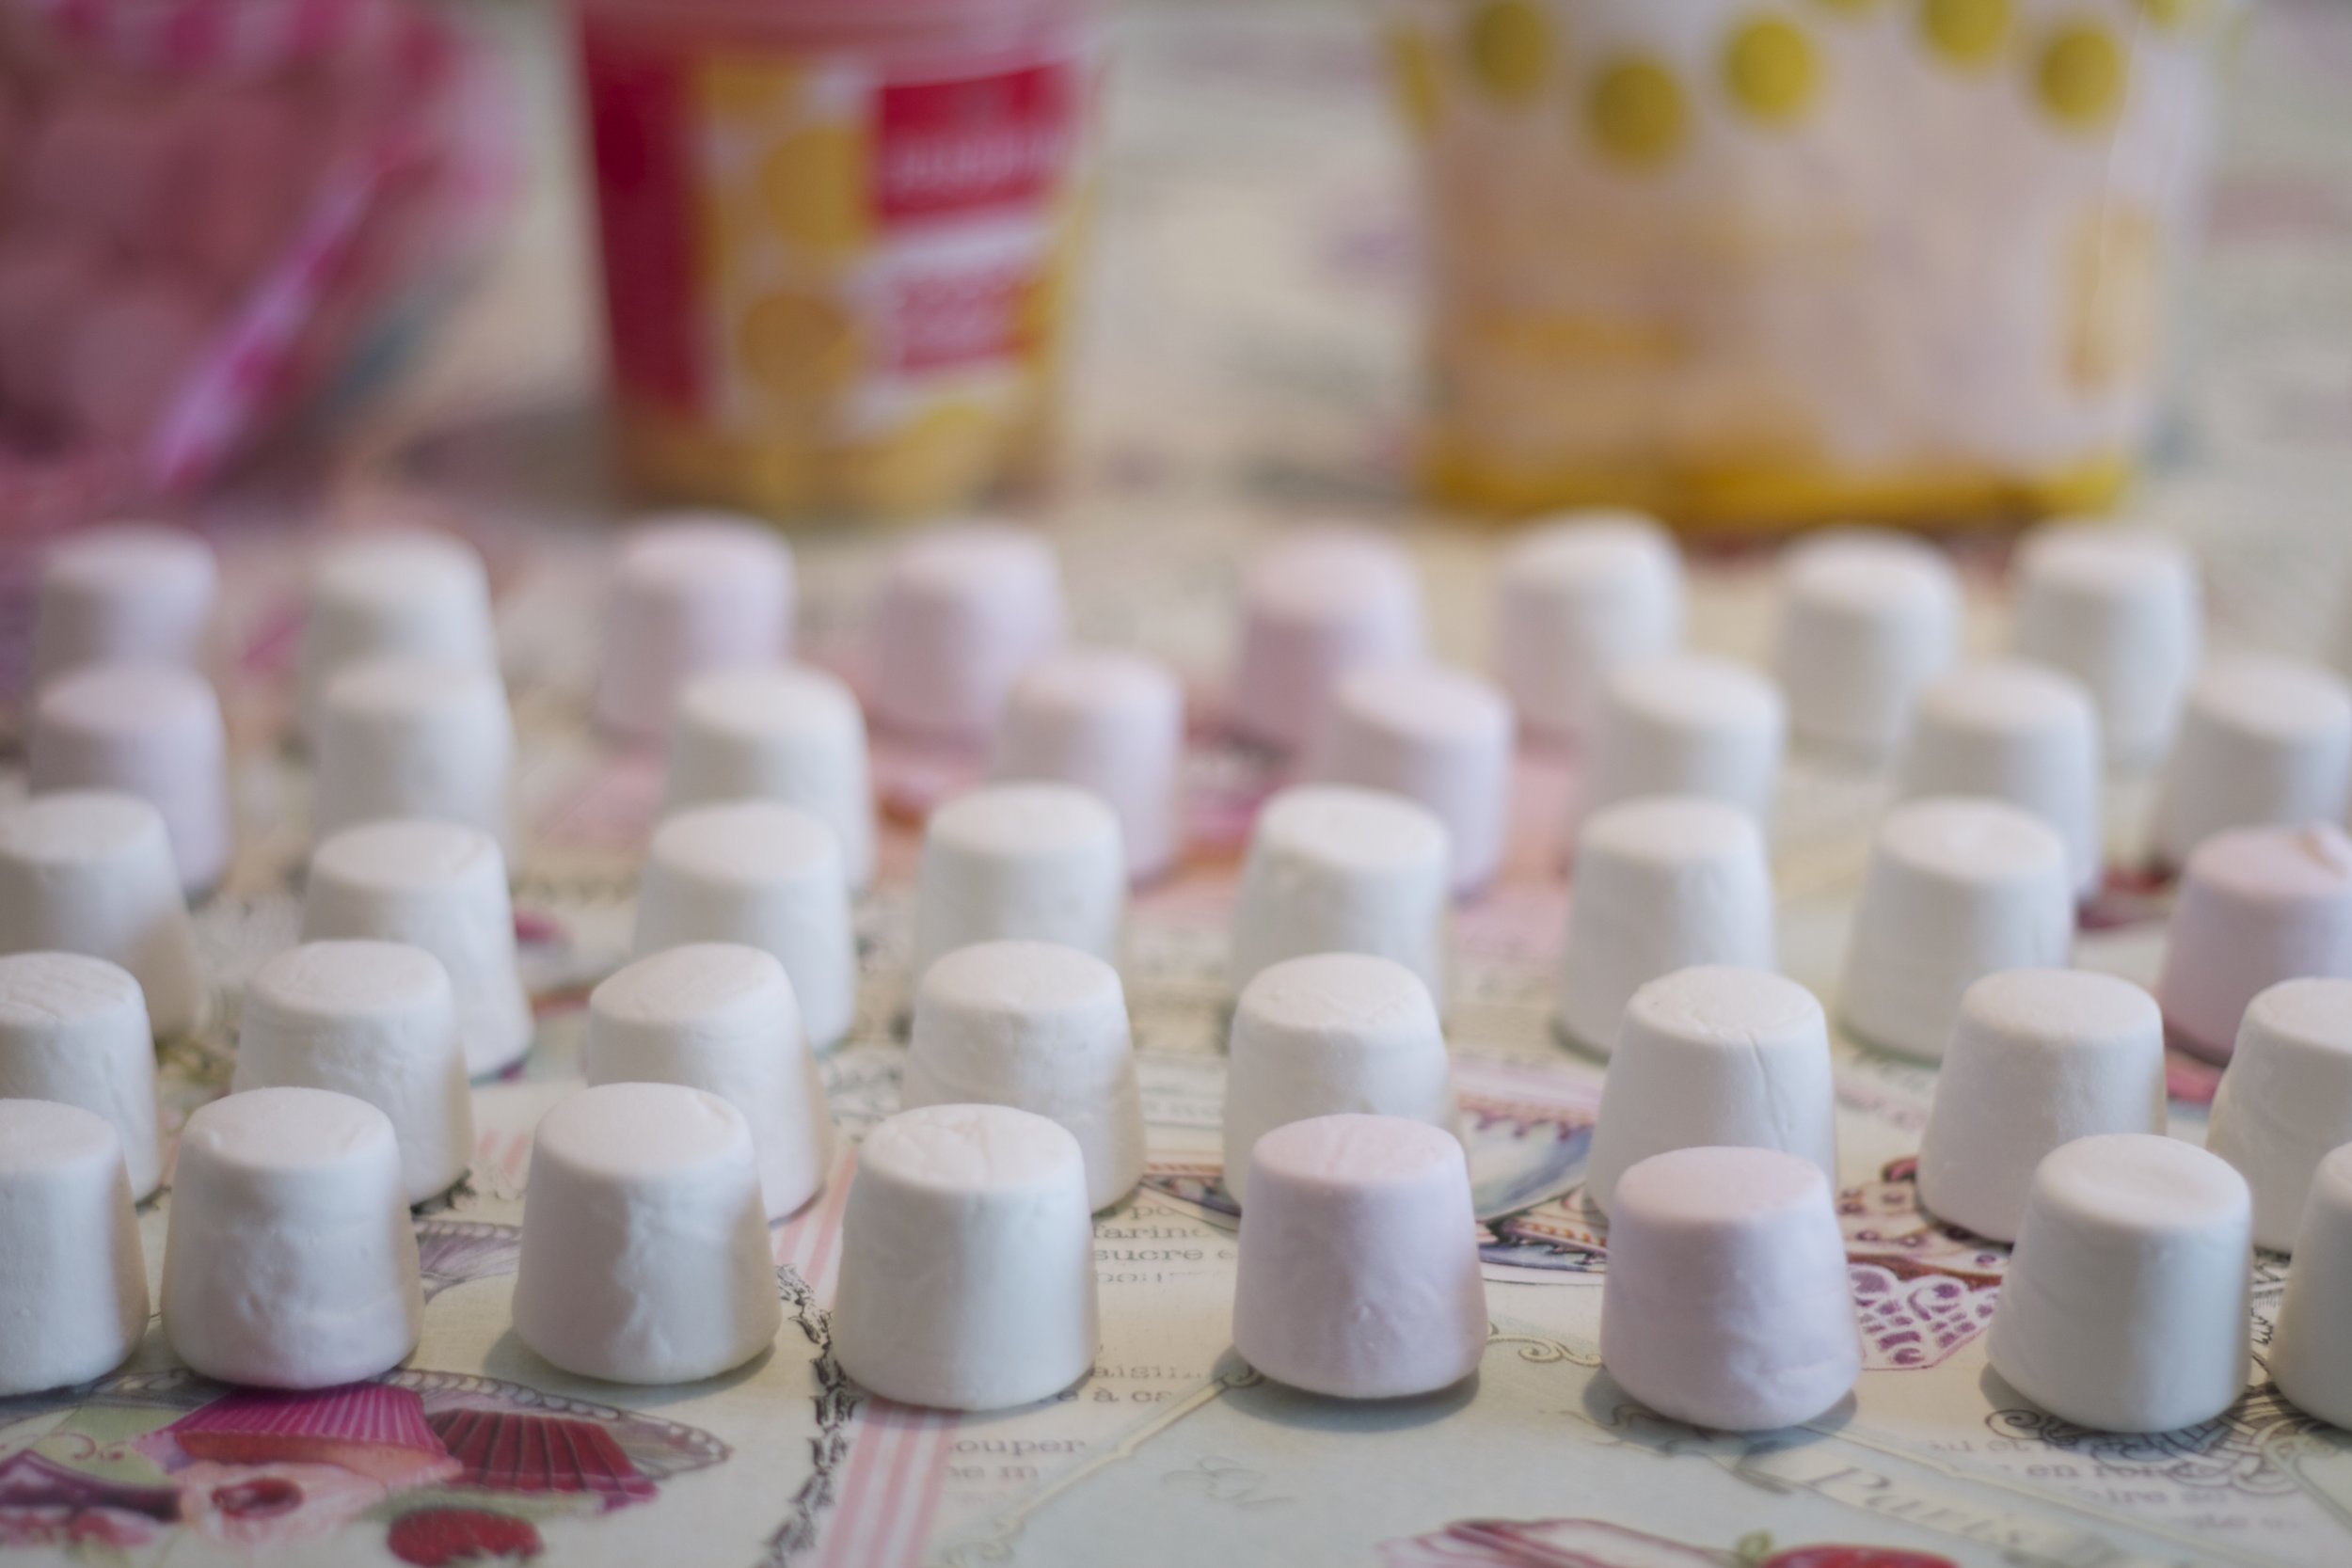
Notice how I have them all wide side down, I'll get to that in a minute. They are now ready for the next phase.
Melt the candy buttons or chocolate and use a small amount to glue the Smarties (or candy coated chocolate discs if you want to be generic) on top.
I had a terrible time with the Renshaw Melts which was disappointing as they were in such a convenient little pot. So I used the PME Candy Buttons instead.
Following the instructions on the packet (I really mean that) melt up a small amount of yellow chocolate and dab a bit on top of the marshmallow and stick down your Smarties, like so.

You can see here I started sticking onto the narrower end, but that looked wrong for a Lego figure head. Aside from the fact that Lego heads don't taper at all, like the marshmallows, the stud on top and the head itself have a certain spacing. They aren't that close to the edges.
The Smartie was just too big on the smaller end of the marshmallow, so I turned them over and this looked much more in proportion.
I applied the melted yellow chocolate with a small food safe brush. This chocolate glue set in a couple of minutes. I didn't time it but when I'd done the last, the first was firm enough for dipping.

Then we insert the sticks. It's important that they have an anchor or they will just pull out when dipped into the chocolate. It's the suction created in the chocolate, like mud pulling off a welly boot.
Dip the tip of your cake pop stick into the melted chocolate or candy melts first, then insert it into the marshmallow. Keeping one finger on the Smartie and my thumb under the marshmallow I pushed my stick all the way in until it touched the Smartie.
There will be a small amount of chocolate outside the marshmallow, creating a ring around the stick. This should create a seal and set firm.

Now we dip and cover the marshmallows. Melt more of your candy buttons (again, please follow the instructions to the letter) but pick the right pot!
It must be wide enough to fit a marshmallow without catching on the side. However, not so wide that the chocolate is too shallow to dip the marshmallow in all the way. I'd also recommend something clear, it makes it easier to see if any part of the marshmallow isn't covered without having to pull it all the way out of the chocolate. You risk pulling the marshmallow off the stick or making the coat too thick with repeat dipping.
Have a cake pop stand or egg carton with little pierced holes in to hand. Florist's foam/oasis also works well. But be careful not to get it on or in the chocolate, don't let your cake pops touch it, it's not food safe and it will ruin the look of your pops.
This is where I started to run into trouble. The melted candy buttons were great and the pops covered well, but shaking the excess off left chocolate spikes. I ran a small off set spatula around the edges which smoothed them out. Phew!
But then I put them upright in the cake pop stand to dry, you can't lay these down it'll ruin the finish, they are supposed to be smooth all the way around. The cake pop stand performed admirably, but the sticks bent, fell over and fell out almost as soon as I put them in. It was frustrating and I knew I'd have to trim the sticks to make them sturdy enough.
The really silly part is Marshmallow pops are significantly lighter than cake pops, they aren't made from cake and icing. If these sticks couldn't handle those I don't think they would stand up to normal cake pops.
Not a good buy, I wouldn't recommend them.
Once the chocolate / candy melts have cooled and set hard you can draw on the faces. I started out with edible pen, thinking I could just draw them on and the first one was ok ... but not amazing. It was a little too pale and not distinct enough so I switched to a small tube of piping icing. It was just one in a pack of 4 colours from a supermarket.
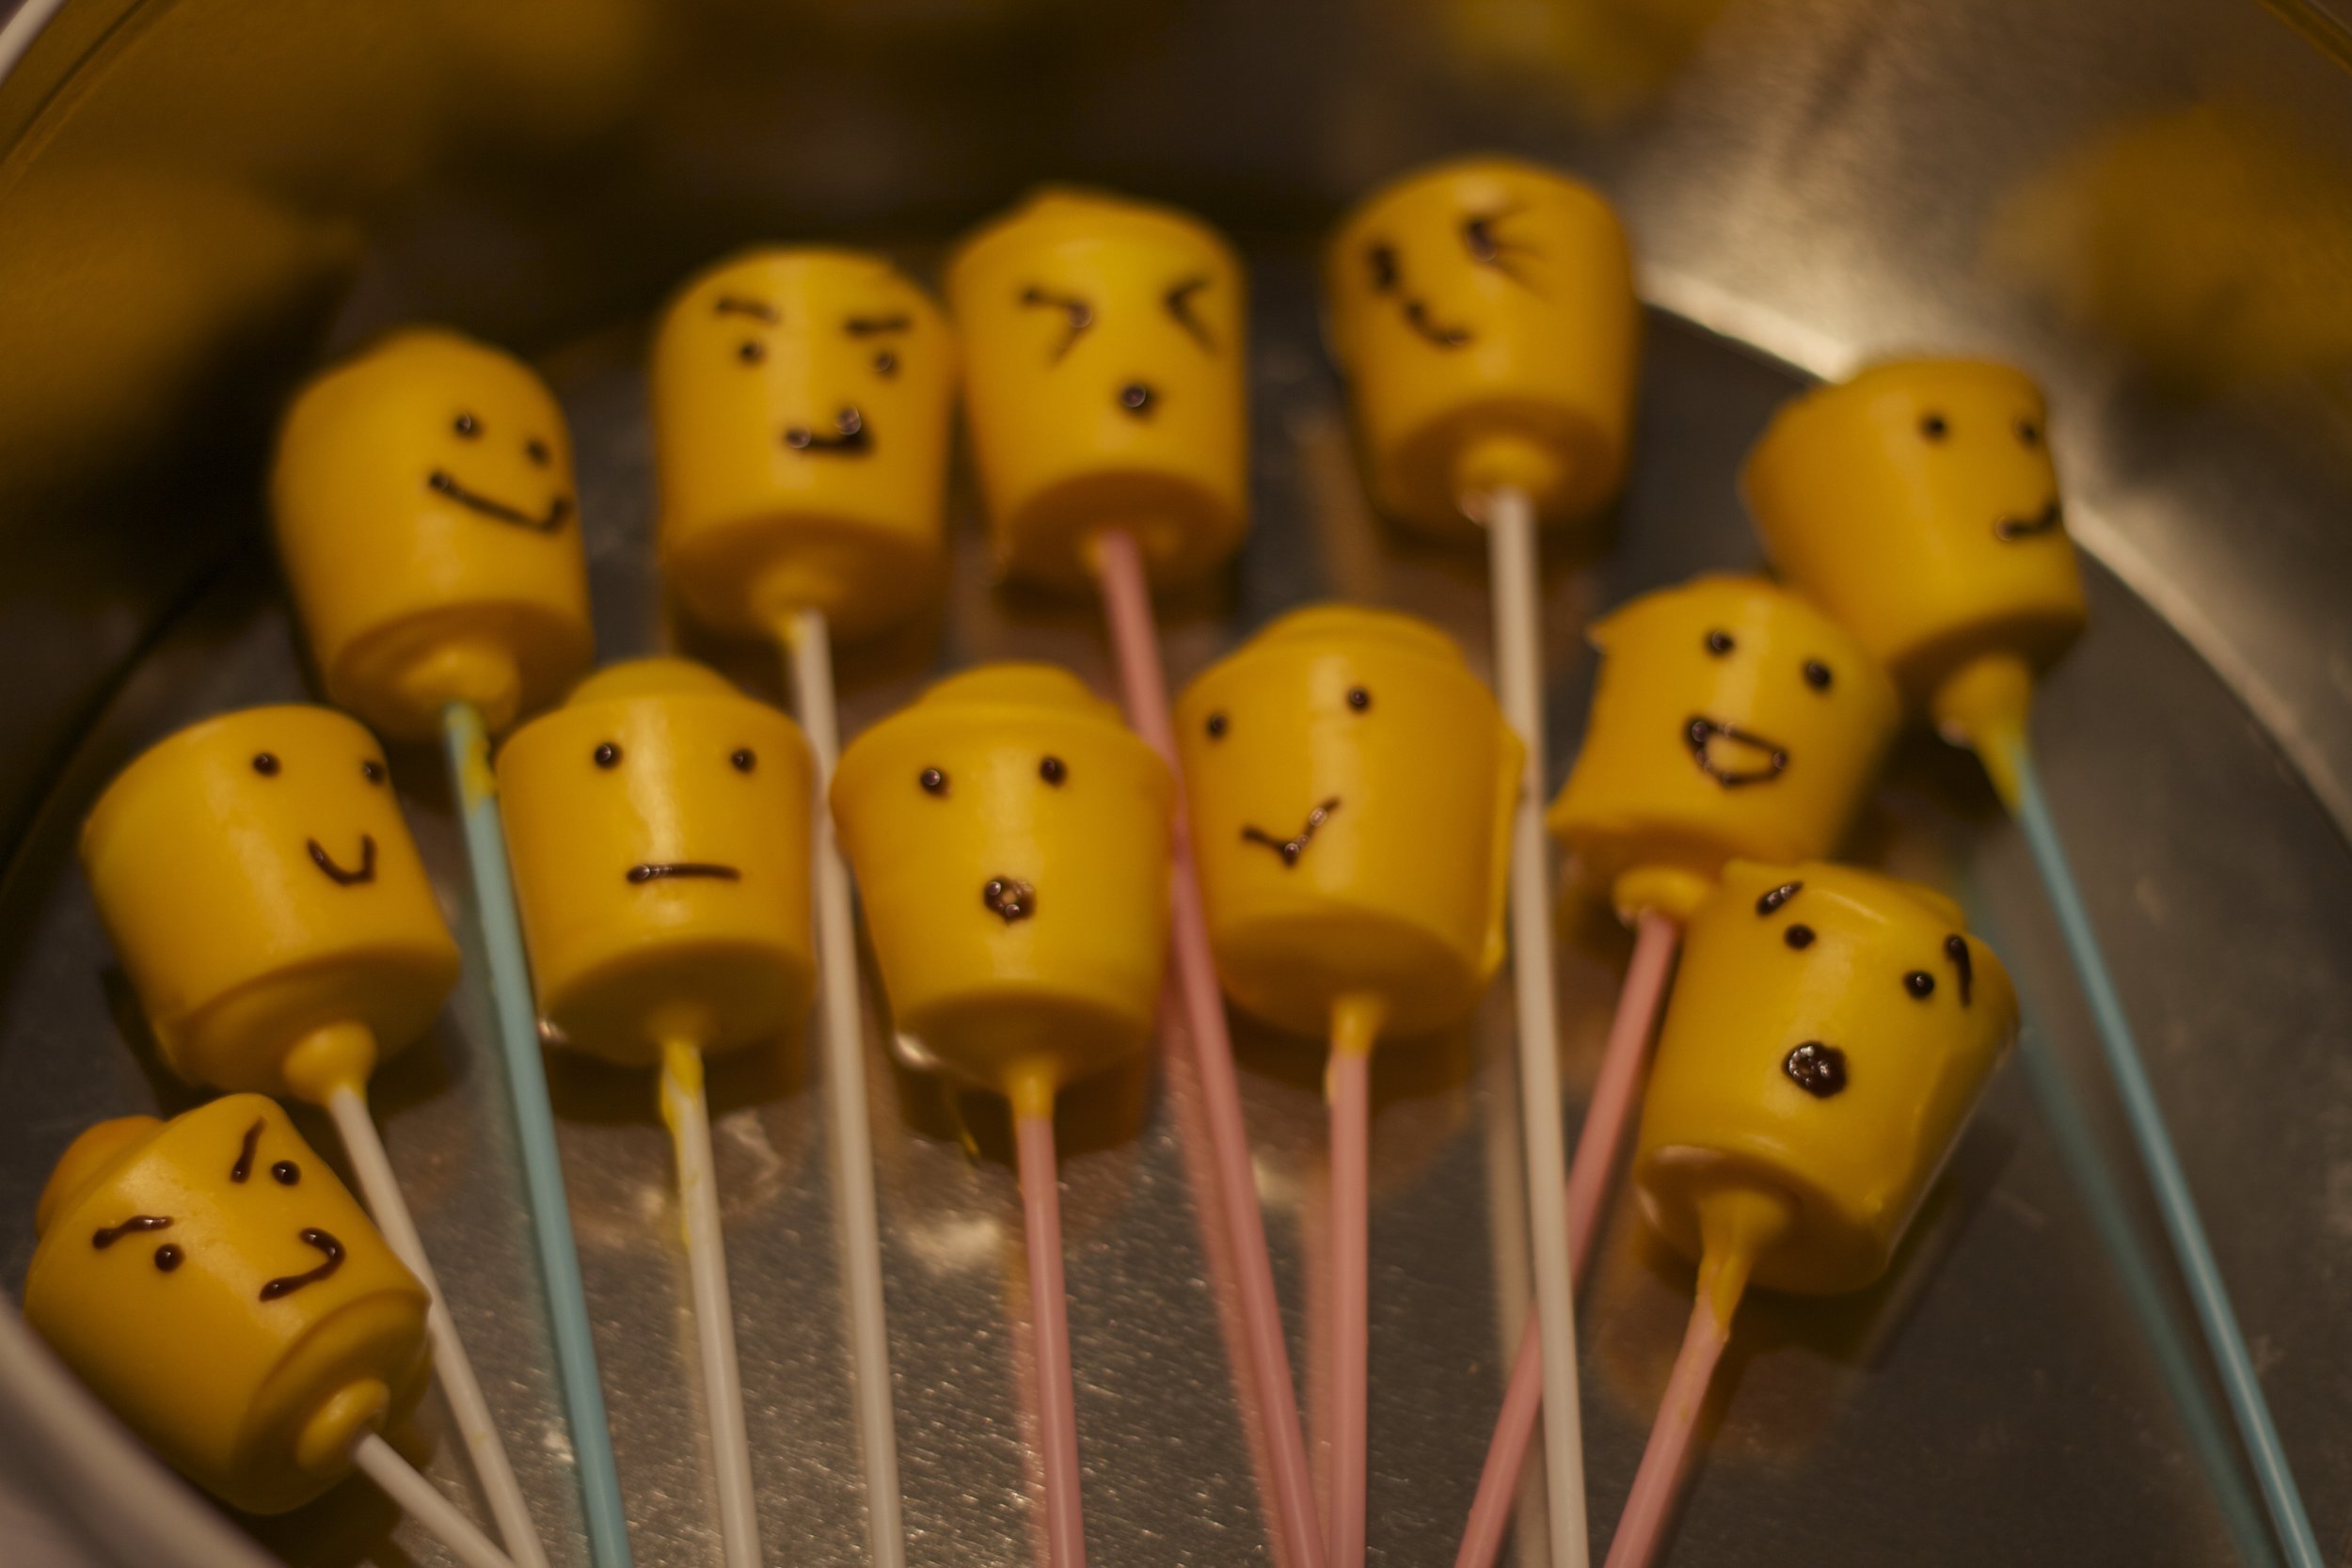
This was a great change, I was so happy with the result. I thought I'd mix it up and do a few different facial expressions. I like the one plotting our downfall the most (bottom left). That probably says something worrying about my state of mind at this point.
The first few steps took minutes to complete which makes you feel positive and productive. But once you start dipping it can all change. It wasn't a total disaster or anything but smoothing each one out, catching the occasional escapee as it was pulled off the stick by the chocolate, re-heating the chocolate when it started pulling marshmallows of sticks (which was a good indicator your chocolate is cooling down and needs heating to thin it out) can become a little laborious. I'm glad I wasn't doing many more than 50.
But, once I started drawing on faces it was all worth it. And they are super cute.

Most important of all, the kids LOVED them. They were the biggest hit of all the snacks at the party. I will definitely be making more cake pop and marshmallow pop creations after this!!
Things I'd do differently next time:
- Use sturdier cake pop sticks
- Use a deep pot for my melted chocolate/candy melts
- Use all yellow Smarties as some of the colours showed through a little
Have you ever made marshmallow pops? Do you have any top tips?