
Cinderella Carriage Cake

2 Tier Chocolate Madeira Birthday Cake
I have had a number of firsts in recent weeks, this cake amongst them. Join me as I walk you through my designing, baking and decorating process with this cute birthday cake.
This month I made my first Wedding Cake and my first birthday cake for someone I didn't know directly.
It's been interesting. And not as stressful as it might have been. I'm not saying it was stress-free mind you!
Settle in with a cup of tea folks, this is a long one.
Earlier in the year a friend of mine put out a request for raffle prizes to raise money for specialist equipment for her terminally ill son. I offered to make a cake. She had such a lovely outpouring of prizes offered that it was June before the raffle for the cake was drawn. By which point I'd already committed to make a Wedding Cake for 2nd July. I've never made that many special cakes that close together.
The winner of the raffle was especially thrilled as her little girl was having her 5th Birthday Party on 9th July. I figured that once I was back from the wedding (we were spending the weekend there) I'd have 4 days to bake and decorate. I hoped that would be enough. I'm not a professional, so I'm sure there are lots of you pro's out there laughing at me being concerned 4 days might not be enough for just 1 cake.
Designing The Cake
So the lovely lady contacted me and we talked about flavours and themes. My day job is somewhat creative so I at least knew how to put a brief together to find out what kind of cake to make.
I offered a limited series of flavour choices. I wanted to keep this cake well within my skill set. Making a charity cake for a little girls party is not the time to be experimenting outside my comfort zone! I cheekily borrowed some Cake Flavour Picker graphics and put together this flavour choice chart.
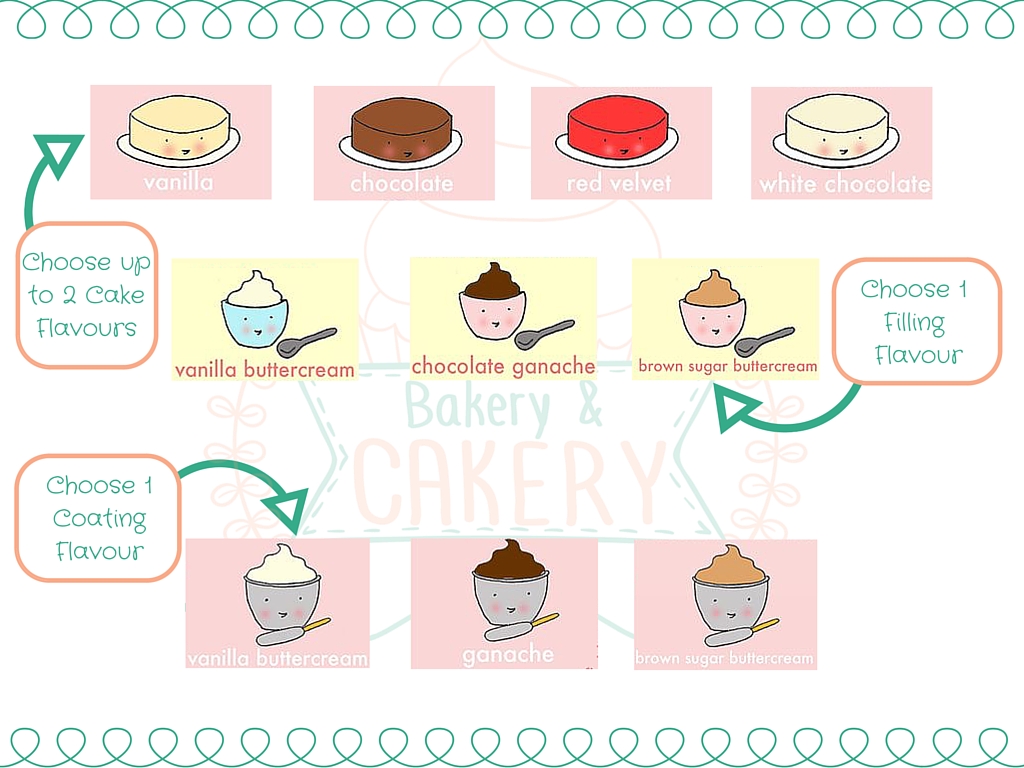
cake-flavour-chart-simple
They opted for a Chocolate Cake with Vanilla Buttercream - a classic combination. I did offer to make them something not on this list if there was a particular cake or icing that they loved. I realise this undermines the point of offering a set choice anyway, but I'm weak like that, ha.
I also established the theme of the party, likes and dislikes of the birthday girl, the time and location of the party and any dietary requirements or restrictions.
I made the models on day 1 of my 4 days. I haven't made many models before and thought if anything was going to go wrong, it would be them. The pig (Wilbur) I copied straight from a picture I found online and I love how he turned out. Charlotte, I sort of made up. I supported her very thin legs with toothpicks and made them separately. I made little holes in the body to insert them into. Her eyes were little almond shapes, she is a girl spider after all and put her mouth on at a jaunty angle. I didn't get any good photos of her, which is a shame. Her head was one ball and her body another. Sadly she didn't quite survive the journey and her legs started to break at the bend when I was setting the cake up.
Baking The Cake
Knowing I had to feed roughly 30 kids and that I needed to transport the cake just over an hour away I based the cake itself on the She Who Bakes Madeira. At the bottom of her recipe, is the conversion to Chocolate Madeira. You substitute the plain flour with cocoa powder and add melted chocolate.
charlottes-web-cake-design
Madeira is a sturdy cake without being dense and firm without being dry. This makes it ideal for layered cakes and tiered cakes.
The original recipe is for a 7inch tin but I needed enough for 6inch and 8inch cakes. I wanted them to be at least 4 inches tall when they were finished, so I needed 3 layers of cake at least 1 inch tall. That plus the buttercream filling, outer coat and fondant on top would be roughly 4 inches tall. This would make the stacked cake roughly 8 inches tall. Which I think is impressive to look at.
I scaled the recipe up and used the weighed egg method to come up with the following recipe, which filled both my 6 and my 8inch pans nicely.
642g Golden Caster Sugar
642g Unsalted Butter
642g Self Raising Flour
11 Medium Eggs
3 1/4 Tablespoons Vanilla Extract
160g Cocoa Powder
321g Melted Dark Chocolate
These are the instructions from Britt's She Who Bakes blog, I've augmented them with a few of my own comments and tips, but credit here to Britt.
Cream together the Butter and caster sugar until lighter in colour and fluffy
Beat your eggs in a bowl first then add them into the Sugar and Butter mix
Once the eggs are integrated add in your flour and chocolate powder.
Add the vanilla and melted chocolate.
Mix for 4-6 minutes on a high speed.
Pour mixture into your, lined, tin. Fill to roughly 3/4 full. Add an extra circle of greaseproof paper on top.
Add water to the bottom of your oven, in a heatproof bowl or tray. Bake at 140C for 1 hour 30 minutes or until a skewer comes out clean. The edges of the cake should pull away from the pan. (Check after 1 hour - top up the water if it's empty. If the outside of the cake is dry but the skewer is wet/cake jiggles lower the temp to 120C for the remaining time)
Once baked, leave in the pan for 5 minutes on your cooling rack. Then turn out onto a sheet of greaseproof paper and leave upside down to cool. This ensures a nice flat top.
Once cooled, wrap in clingfilm overnight to ‘settle’.
Once split, filled and iced, this cake will last 7-10 days and will freeze well for 3 months.
I'd say they turned out well.

6inch-chocolate-madeira-cake

6inch-and-8inch-madeira-cut
For the buttercream, I went with my old faithful Swiss Meringue Buttercream. I honestly rarely, if EVER, make standard buttercream anymore. SMBC is light as well as rich. It's a delight to flavour, colour and pipe. It is sturdy and stable and stands up to heat well. This was really important as we've had something of a hot spell this July.
I've seen an endless stream of Cake Decorators bemoaning the humidity, fondant woes and melting buttercream. I knew my SMBC would stand up to the heat and taste fabulous. I didn't have any trouble with my buttercream. I chilled it in the freezer for about 30 minutes before I covered the cake.
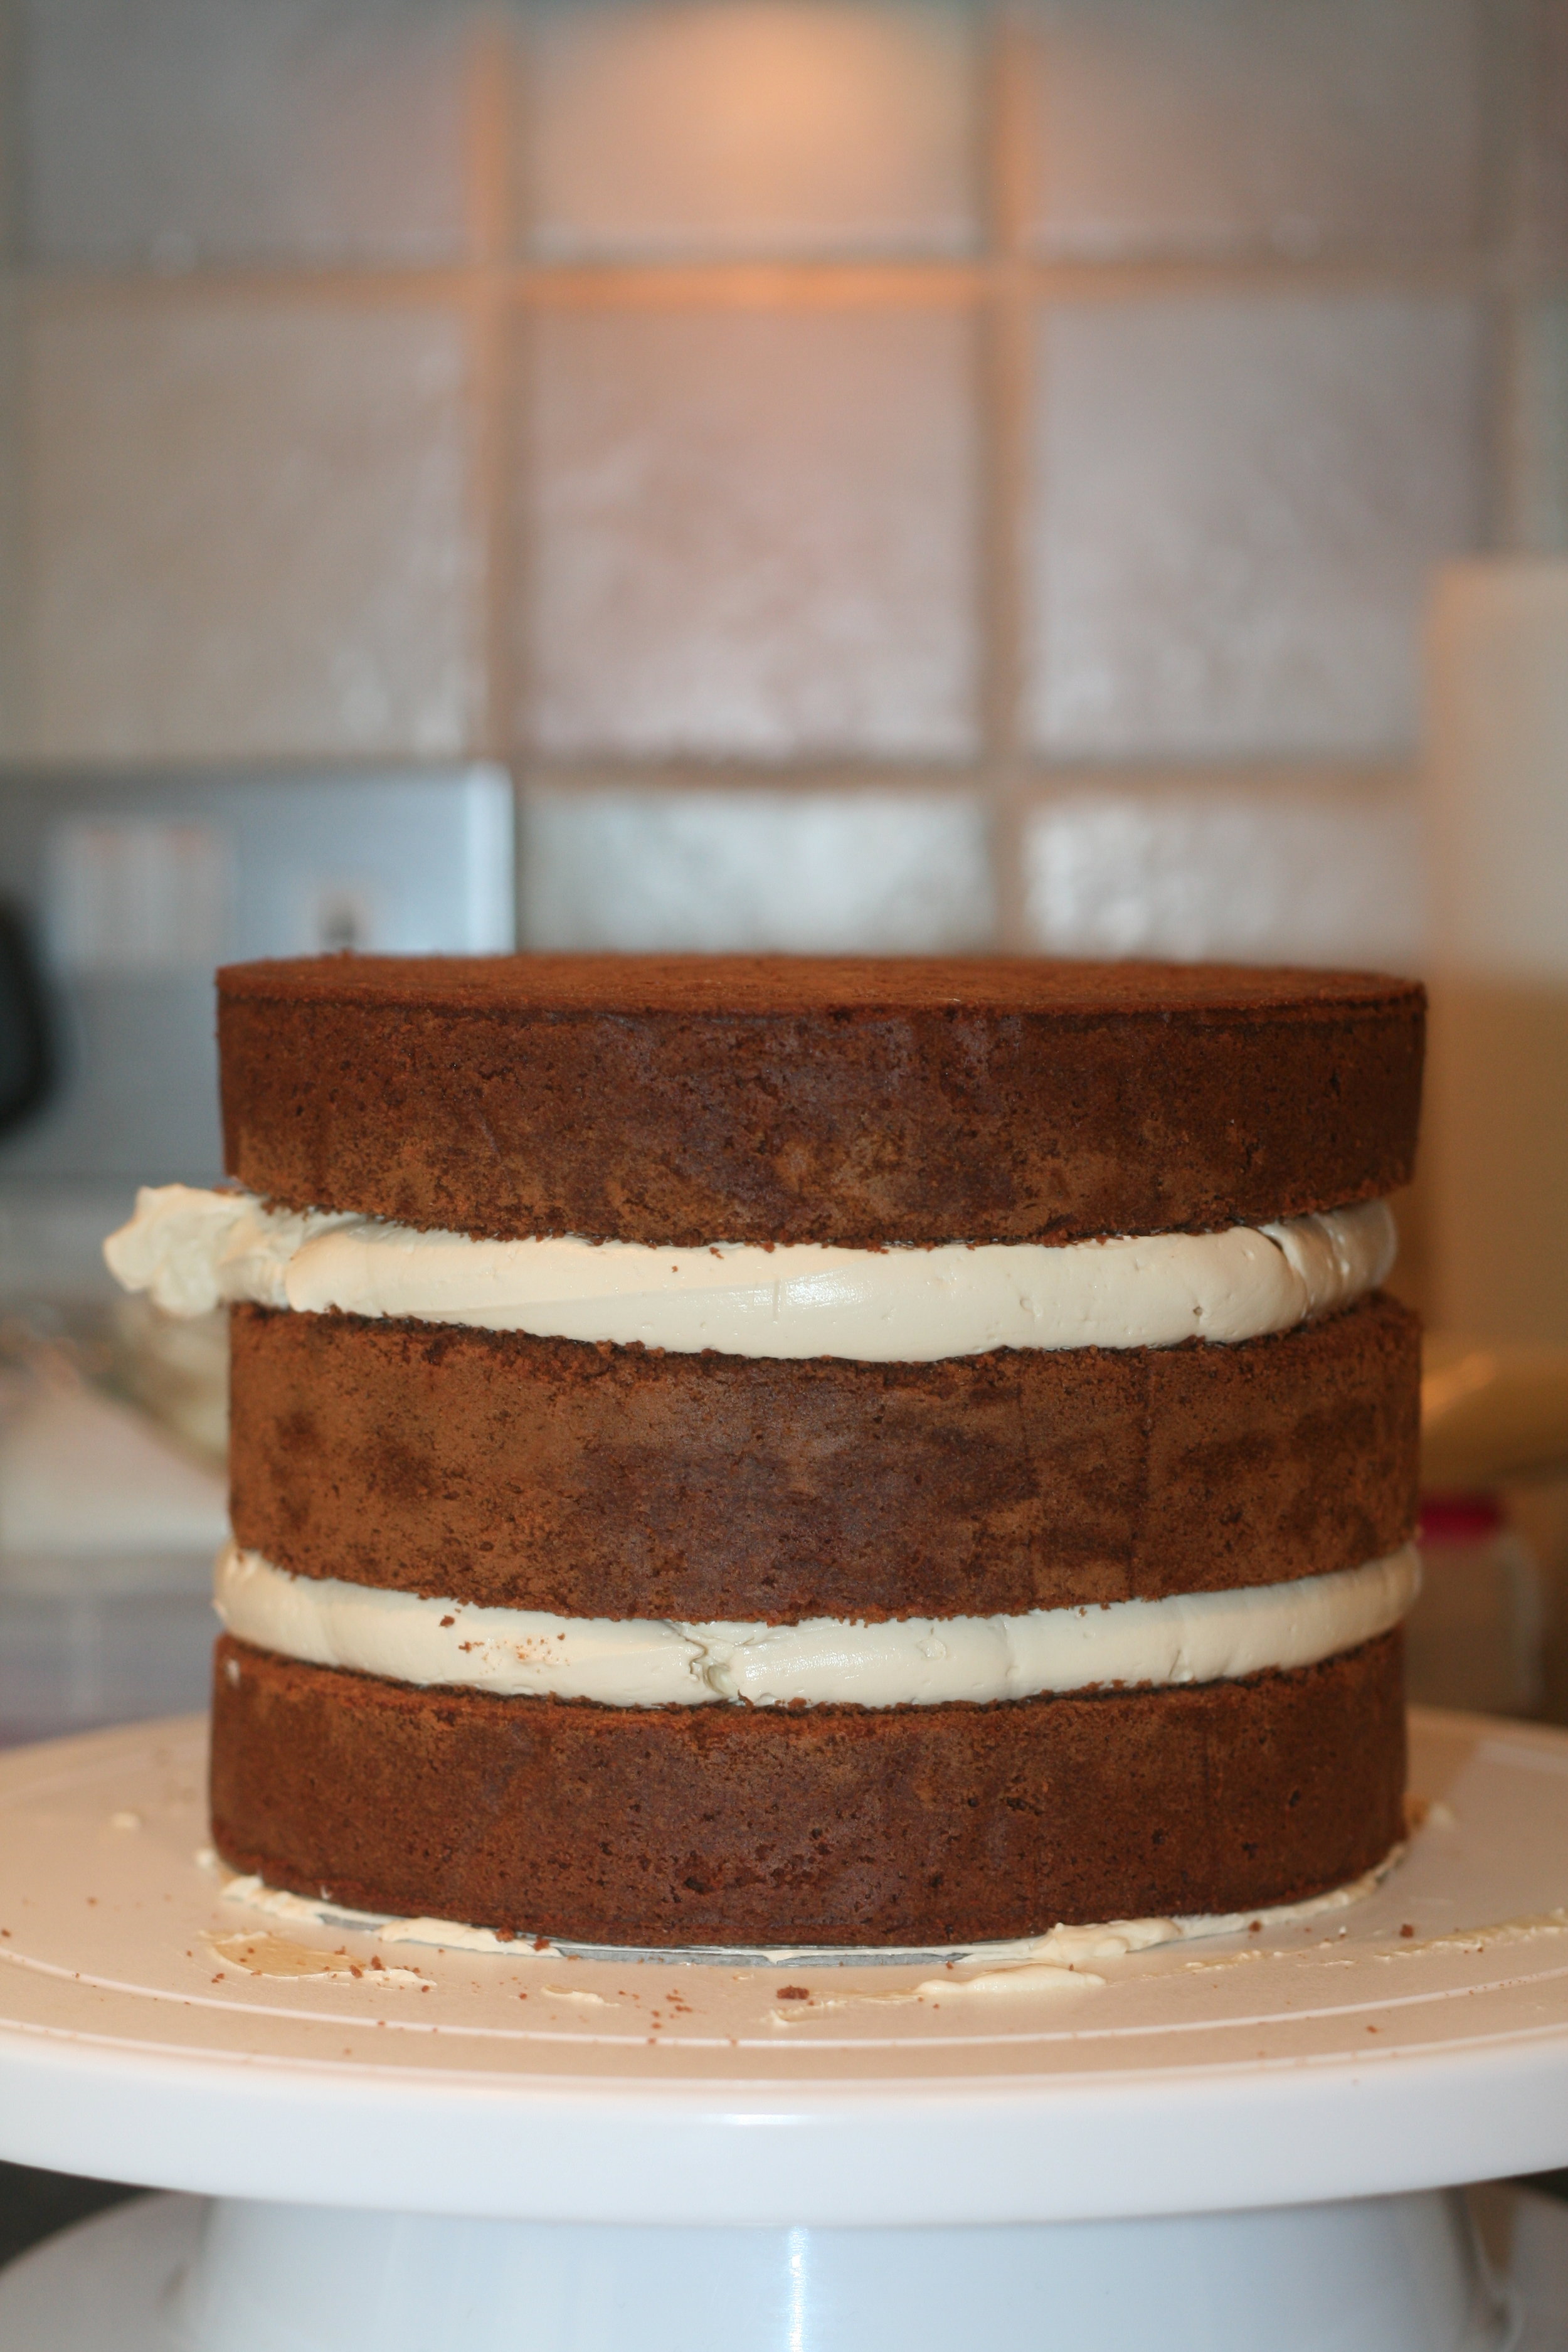
filled-chocolate-madeira
Decorating The Cake
The night I covered my cakes was pretty hot and my fondant threatened to dry out if I didn't work it quick enough.
I went for Karen Davies marshmallow fondant. I love MMF and have made my own, but I just wanted to take as much pressure as possible off myself for this cake. I tried Karen Davies Sugarpaste at Cake International last year and thought it was delicious, so I bought a load.
It coloured really well, although I did add a little too much pink for my bottom tier. It was supposed to be 'very pale pink' and looked great when I first coloured it. But, of course, food colours mature so it was brighter and deeper than I wanted.
The fondant did struggle a little in the heat, and I had to pull all the fondant off and start again on one tier. But if I moved quick enough it went on fine. No elephant skin. There were 2 tiny tears, but I made my first ever batch of Gunge and covered them. It wasn't too bad a job, you couldn't really tell where the marks were.
I could, they drove me crazy, but perhaps I'm being too critical.

6inch-chocolate-madeira-covered-in-pale-green-mmf
It smoothed well, though, once my fondant smoothers stopped sticking to the tacky fondant. It was hot and humid, so not the fondants fault. I popped a fan on my table and waited. It was a little nerve-wracking but worked out nicely.
The top tier had an indented and painted spider web pattern. I did this free hand, with a silicone cake tool and painted with some edible Rainbow Dust mixed with Revitiliser. The colour is 'Metallic Light Silver' but it came out MUCH darker than I was hoping. I'll test these things thoroughly in future!

8inch-chocolate-madeira-finished
I bought a wood grain impression mat and decorated the board with white wood grain. I've wanted to do that for ages, so this was the perfect excuse. I also made a fence panel template out of a flexible cutting mat. My mum (bless her) then helped me, in a little production line of the 2 of us, cut out the fence panels for the bottom tier, emboss them and stick them to the cake.
The number '5' was pale pink dots, on a white background, mounted on an oval of pale green. I put a bamboo skewer through the oval for support and to have something to insert into the cake.
I cut the little girls name using FMM Funky Letter Cutters, and I desperately wish I had positioned them better. That and I'd stack the top tier so the centre of the spider web lined up with the centre of the barn door. I also cut out lots of little flowers in the pink and white and dotted them all about. I loved that part.

Charlottes Web Birthday Cake
Honestly, I haven't enjoyed making a cake as much as I did this one. All the little fondant flowers, the models (which I don't usually do), the design process and seeing it come to life! It is very satisfying to have an idea on paper sitting in front of you in the flesh, or in the cake in this case
If you have any questions or comments about the cake, let me know below.
Charity Donation Birthday Cake
This week I am going to tell you about a little girls birthday cake I made. But first I'm going to tell you why I made it. I'm going to talk about a sick little boy named Vinnie.
Vinnie was born with a rare genetic condition called SMA Type 1 - he requires breathing support and a feeding tube and he cannot swallow. He is also somewhat immobile and receives physical therapy. It is ultimately a terminal condition. Vinnie is 16 months old.
Vinnie's is certainly not the only child with this rare illness, but his particular story has been featured in the press and been written about by other bloggers.
If you'd like to learn any more about Vinnie you can check out the Our Boy Vinnie Facebook Page,
There is currently no approved treatment for Vinnie's condition, but there is a drug on trial. So far there have been incredible results. Children on the drug seem to be able to walk, dance, swallow and live long beyond their prognosis. I'm not a doctor or a medical researcher, but I do appreciate these things take time. There isn't a drug on the market that doesn't have side effect and it is irresponsible to release medication to the public that hasn't been rigorously tested. But, as Vinnie's mother herself has pointed out, these children already have a terminal diagnosis. A little more quality of life in the time they have would be a miracle.
There is a petition to push to allow children with SMA Type 1 to be given the chance to walk on their own, eat and maybe more. The petition is to give terminally ill children access to this trial drug. I know Vinnie's family would be extremely grateful if you felt that you could sign it.

Children with Type 1 SMA rarely make it to 2, many don't make it to 1. Despite this, the British Government doesn't offer any financial assistance until disabled children reach 3 years old. Vinnie is under the care of 3 different hospitals and there is obviously some free care on the NHS but there is a lot of equipment and other things that the family needs. Which they have had to fund themselves.
And that is where I - and this cake - come in. Vinnie's Mum Kelly and I went to school together. She started running a series of raffles to raise money for a specialist car seat, buggy etc. Equipment meant to make Vinnie's life a little more enjoyable and make it a little easier for his parents to care for him. She asked if anyone had anything to donate.
I offered up a cake. It isn't much, but we can only do what we can with what we have.
The lady who won the raffle was a lovely Mum looking for a birthday cake for her little girls 5th birthday party. It was pretty good timing as her birthday was around a month after the prize was drawn.
This has honestly been one of my favourite cakes to make to date. I liked the bake, the recipe was great and tasted fab. I enjoyed the fondant covering process despite the weather (more on that later). It was very pressured because this was for a little girls party and I wanted it to be wonderful. But I gave myself (almost) enough time, so I didn't feel too rushed.
They decided to keep things simple flavour-wise and went for a chocolate cake with vanilla buttercream. I went with the Chocolate Madeira Cake from SheWhoBakes and my favourite Swiss Meringue Buttercream by Sweetapolita.
Keira, the little girl, loves Charlotte's Web and there was no shortage of inspiration on Pinterest. In the end, the birthday girl opted for elements from 2 different cakes, a barn and a spiders web with some fondant figures. A number '5', a pig and a spider, naturally.
This was my final design.
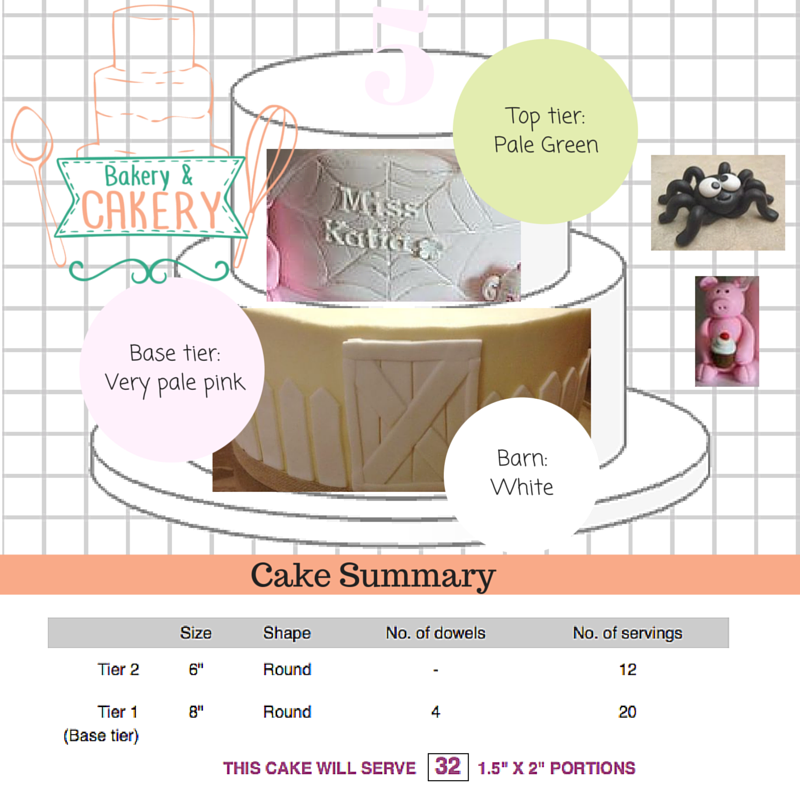
And here is my final interpretation of this design.

It isn't perfect - but I don't know a cake maker who ever feels their work is. But I have to say I am pretty happy. I'm proud of the little flowers, I think they really finish the cake. I'm also pretty chuffed with my fondant models too, I've only made one model before, so these aren't too shabby.
I'll do another post going into this cake in more detail. But for now these are the changes I'd make if I could go back:
- I'd spend a little bit more time smoothing. It just wasn't 100%
- Wider board and put either the Pig or the Spider down at the bottom.
- Cover the edge of the board in ribbon.
- Centre the name. I'd start with the 'E' in the middle of the web and work out
- When placing the top tier I'd make sure the centre of the web lined up with the centre of the barn door
- I'd take better photos!
The photo part is important, I assembled the cake at the venue. So I couldn't take pictures with a backdrop and what have you. But I could have spent a little more time and taken a better shot.
Anyway, let me know what you think of this one - any questions let me know.
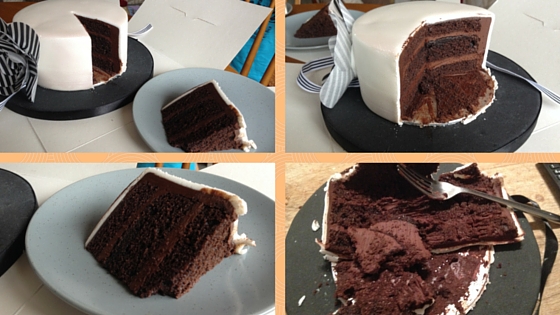
Ganache Covered Layer Cake, Wafer Flowers and Fondant Part 2
Ah welcome back kindly blog readers. My last post was about a class I took to improve my cake decorating skills. This is the exciting conclusion. I may be overselling this a bit.
I'm always interested in making more professional looking cakes. I'm a hobby baker, I don't sell cakes, I don't think I could take the pressure. None the less I want my cakes to look like I could. I took the class to focus on getting that perfect finish on the coating layer whether that be ganache or buttercream. I have long known the secret to covering a cake in fondant smoothly is a perfect coating on the cake.
That was the second thing I wanted to achieve. A perfect fondant layer. I usually find myself disappointed with my fondant covered cakes because they just aren't perfect. I end up with puckers or little tears, wrinkled fondant which is called elephant skin (nice). I had turned to making my own fondant which helped a bit but this class really gave me confidence, so I shall tackle my next fondant project with gusto!
The class covered the following:
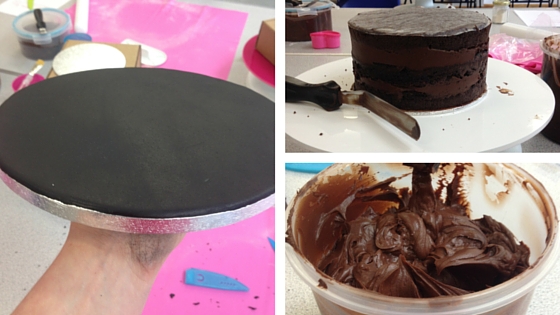
- covering your cake board
- cutting & stacking a cake
- making ganache
- filling a cake with ganache
- covering a cake with ganache
- achieving that perfect sharp edged ganache finish
- covering a layer cake in fondant
- creating a lustre dust painted finish
- making and applying wafer paper flowers.

Phew, that's a lot - probably why it took all day.
I did say last time that I wasn't going to give away any of the actual guidance from the class, that's only fair. I paid to learn and Kirsty earns a living from teaching it, so stealing her Intellectual Property would be unkind. BUT one tip I will pass on is that patience does seem to be the trick with ganache. We all spent a considerable portion of the class covering and smoothing our cakes. That is fine in a class, and most of us there are the perfectionist type, so we took the time to get it right. I just hope I can get faster because I won't always have all the time I want to cover a cake.
*Update* I have since covered a couple more cakes in ganache and I'm getting MUCH quicker - so practice makes perfect.
It has to be said, much to my husband's delight (he is not Team Buttercream), I may never buttercream a layer cake again - fill it yes, cover it no. I'm a ganache girl now.
Aside from anything else the cake I took home was yummy
Oh and I enjoyed the experience of taking a class so much I've booked myself on another one. If that's not an endorsement then I don't know what is.
I'd love to hear about your class experiences and recommendations!!

Ganache and Wafer Flowers - My First Cake Decorating Class Part 1
On Saturday 13th June I live tweeted the first ever professional cake decorating class I've ever taken. It was fun, a little tiring but very insightful & not just from a cakey perspective.
The mix of students in the class I took was interesting, there were seven of us all together & we broke down like this.
1. 2 professional bakers (made cakes for money) one full time, one not.
2. An engineer who doesn't do much decorating but is helping a friend make a wedding cake
3. Enthusiastic hobby-ist and first time class taker
4. Professional cake class taker, or at least she had taken classes with this instructor before
5. A Financial Industry professional who describes cake making/decorating as a 'hobby on steroids'
6. Me, hobby baker & blogger.
Oh & all women. I don't say that for any reason other than it was true & partly because I expected it to be the case. Make of that what you will.

The class was taught by Kirsty, the mastermind behind CakeyBake, you can also find her on Facebook, it was a full day class & covered many techniques (more on that in my next post)
I don't intend to give away any secrets from the class, but if you want to know more you can always contact Kirsty on her website, or hey, why not take the class yourself.
I would definitely recommend that by the way. Kirsty herself is fun & energetic while keeping 7 wayward cake ladies on track when we were chatting. Her teaching style is effective & she explains things clearly, whilst also demonstrating them.
I watch a lot of teaching / cake demo videos on youtube and I've bought a fair number of Craftsy classes but for me there was definitely something brilliant about a live class situation. It isn't just being able to ask questions (although that is handy) it's being able to watch what your instructor is doing from a couple of angles, there were a few of us bobbing around behind her and next to her to watch how she did something.
If I had one criticism, and I feel like I've started writing a review here so I should present a balance, it's that if I got stuck and asked for help close up Kirsty would oblige. She would explain and demonstrate again what to do (she is an incredibly patient woman). That doesn't sound like much of a criticism I know, in fact, most of you are probably saying 'what on earth would you expect her to do?' it's a fair question. What I mean is she would complete the step for me, up close on my cake so I could see. I learn well by watching, I learn better by doing and in those instances where I needed more help, I would have liked to have completed the step myself, with her guidance. That way I definitely know I can do it. It's not a big deal and I'll practice these skills again on my own anyway.
I was totally blessed by my cohorts on Saturday, the Pro's had more tips and advice to add to Kirsty's extensive knowledge, the ladies who'd taken other cake classes had info they'd picked up and one other, my 'hobbyist on steroids' well I could have become best friends with her brain. She pitched in regularly with gadgets she'd tried or techniques discussed by other instructors and even the latest change in EU law concerning the use of IPA when creating luster dust "paint".

One of the highlights of my day was definitely lunch time. That sounds bizarre as I have lunch every day, but it was a great opportunity to just sit and talk with everyone, Kirsty included. We talked about cake. I am not often surrounded by people who want to discuss the finer points of baking, the laughter and tears. That feeling when a cake sinks or you pipe a perfect rose. We all have other things in our lives, even those who baked for a living so cakery isn't the be all and end all but it's something we all loved. As with any conversation about a 'love' it quickly turned to horror stories.
Imagine a sunny wedding day, a bride preparing for her big day, excited about all the little details. And her cake. She has asked a trusted baker to make the cake she will serve her guests. The cake that will stand proud in the reception venue, the cake that will have photo's taken of it as though it were a celebrity. The baker, who doesn't usually do wedding cakes, has taken care and patience over making this cake perfect. She is also about to leave for a holiday abroad, on the same day as the wedding. With a car packed for the airport, the cake is carefully loaded. They leave home, stomach full of nerves, boot full of fondant and sponge. They turn the first corner at the end of their road and there is a sickening sound. A box sliding, tipping, falling. The baker stops the car and her worst fears are confirmed. The cake has fallen.
We all commiserated, hands over our mouths, lumps in our throats. It's a tale to chill your bones and your icing.
Check back in with me for my next post and more information on the class itself.